
Download the latest version of this document here:
https://links.crunchtime.com/OEQS-AIFormBuilder
… or scan the QR code to the left.
Take an interactive walk-thru https://links.crunchtime.com/OEFT-AIFormBuilder
Use Generate with AI in Ops Execution to turn a form you already have into an editable Ops Execution form or describe the form you want and let AI build it from scratch. After it’s published, make any edits to the form in the form builder. This guide is for Corporate Systems Admins and above-store leaders who are new to the feature.
… or scan the QR code to the left.
Take an interactive walk-thru https://links.crunchtime.com/OEFT-AIFormBuilder


A form is how your team collects information in the app - checklists, logs, inspections - built from the questions you need answered. Start here when you want AI to build a form for you, either from a file you already have or from a short description.
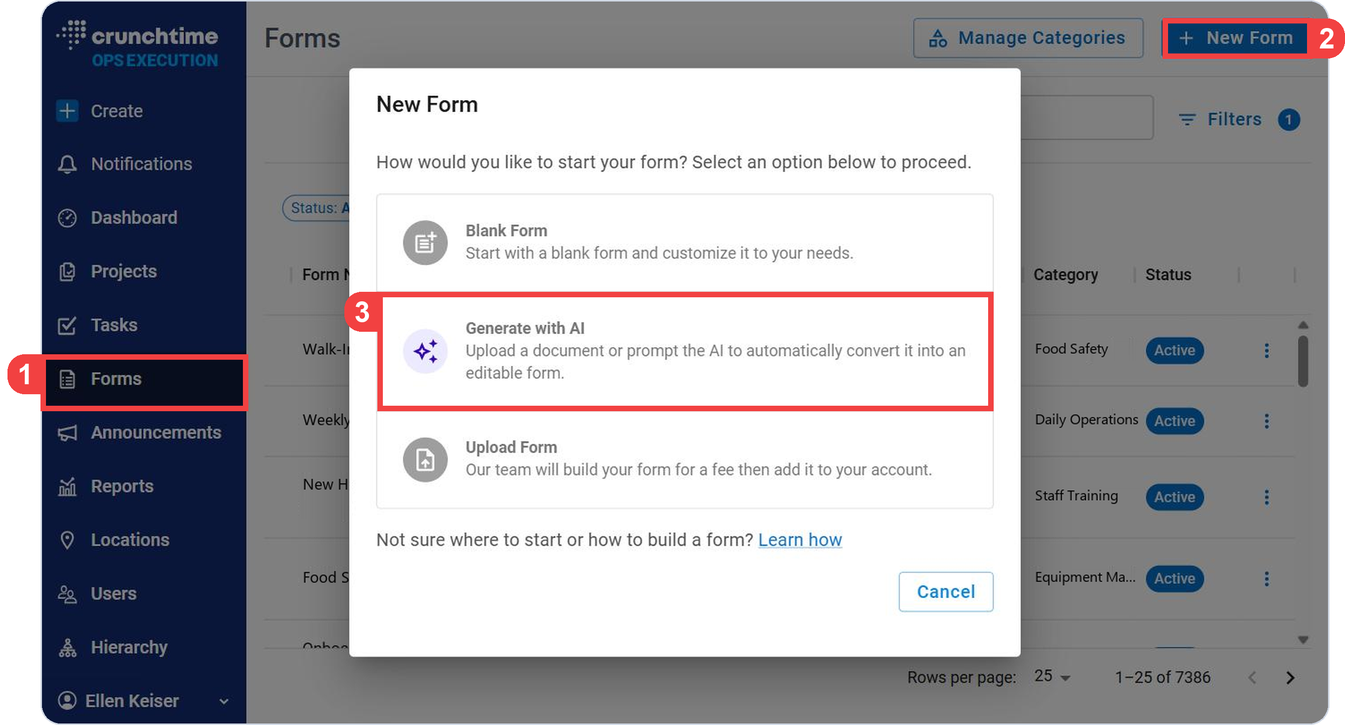
Select Forms in the nav bar to navigate to the Forms page.
Select New Form at the top right of the page.
• The New Form window shows three ways to start: • Blank Form
• Generate with AI
• Upload Form
Select Generate with AI.
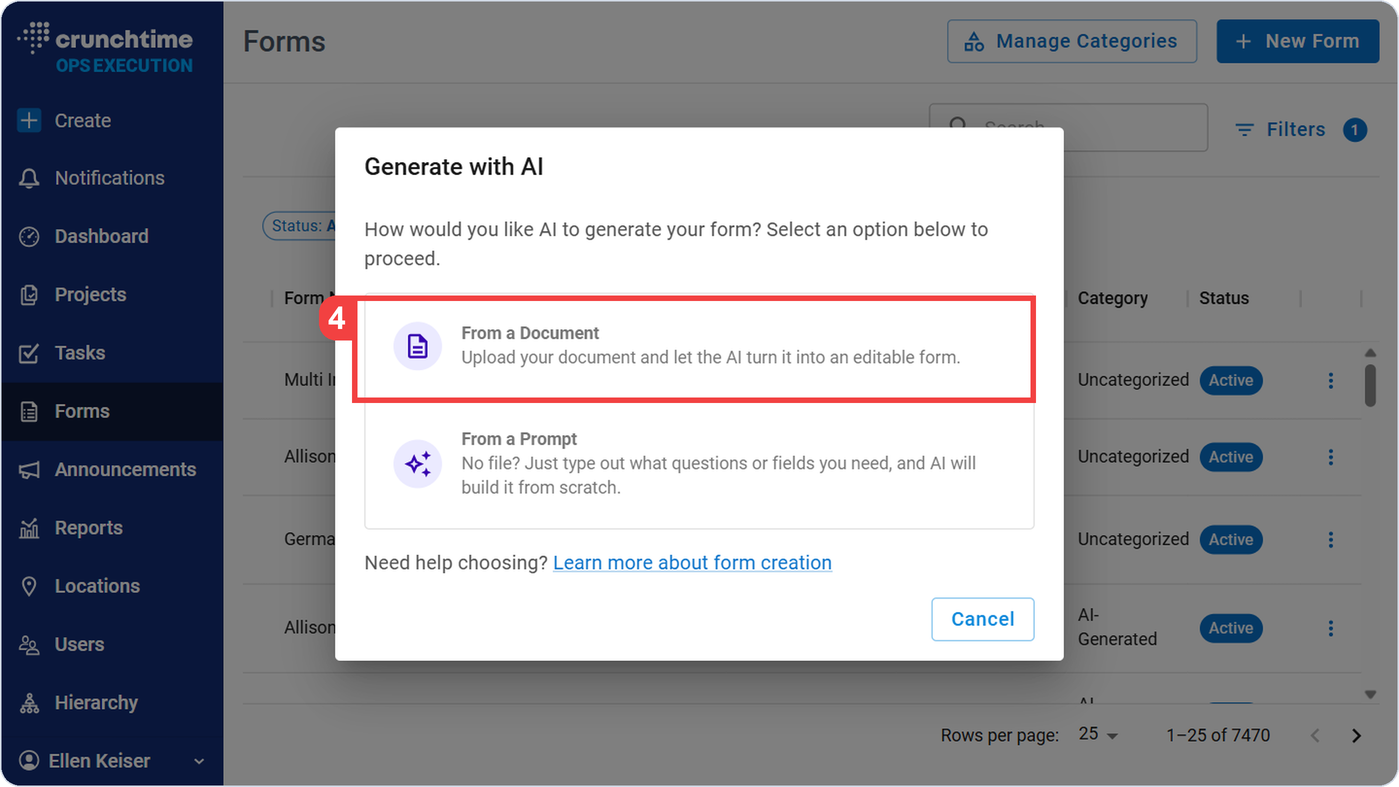
Select From a Document.
A new window asks how you’d like AI to generate your form, with two options: From a Document and From a Prompt.
The AI needs a file to read, a name for the new form and a category. Category is always optional and will default to Uncategorized. The Generate form button stays grey until you finish these.
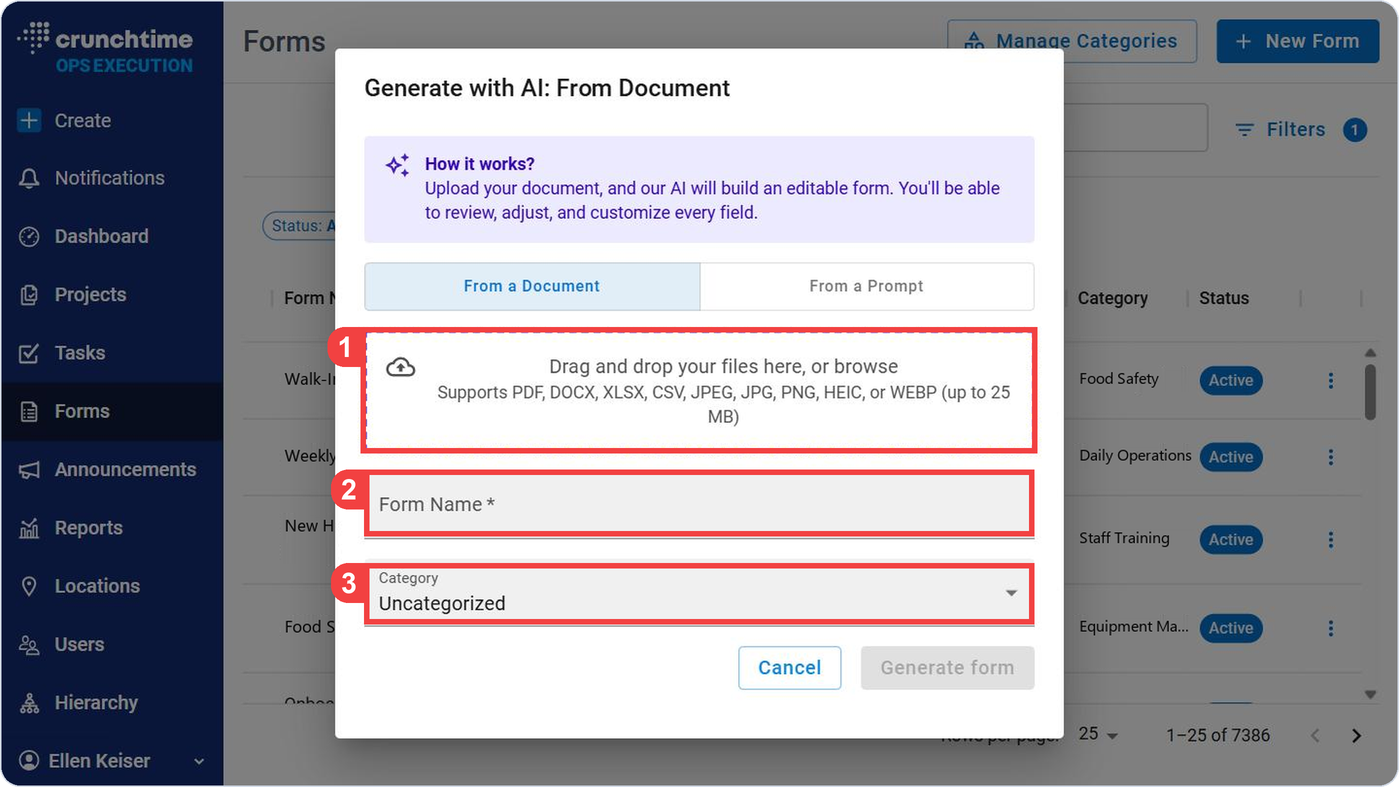
Drag your file into the upload area, or browse your computer to find it. • The upload area lists the file types it accepts, including PDF, DOCX, XLSX, CSV, JPEG, JPG, PNG, HEIC or WEBP (up to 25 MB).
Enter a name for your form in Form Name. • Pick a name your team will recognize in the Forms list.
Form Category is optional. Choose a category from the Category list, or leave it at the default Uncategorized. You can edit, create or delete form categories by selecting Manage Categories from the Forms page
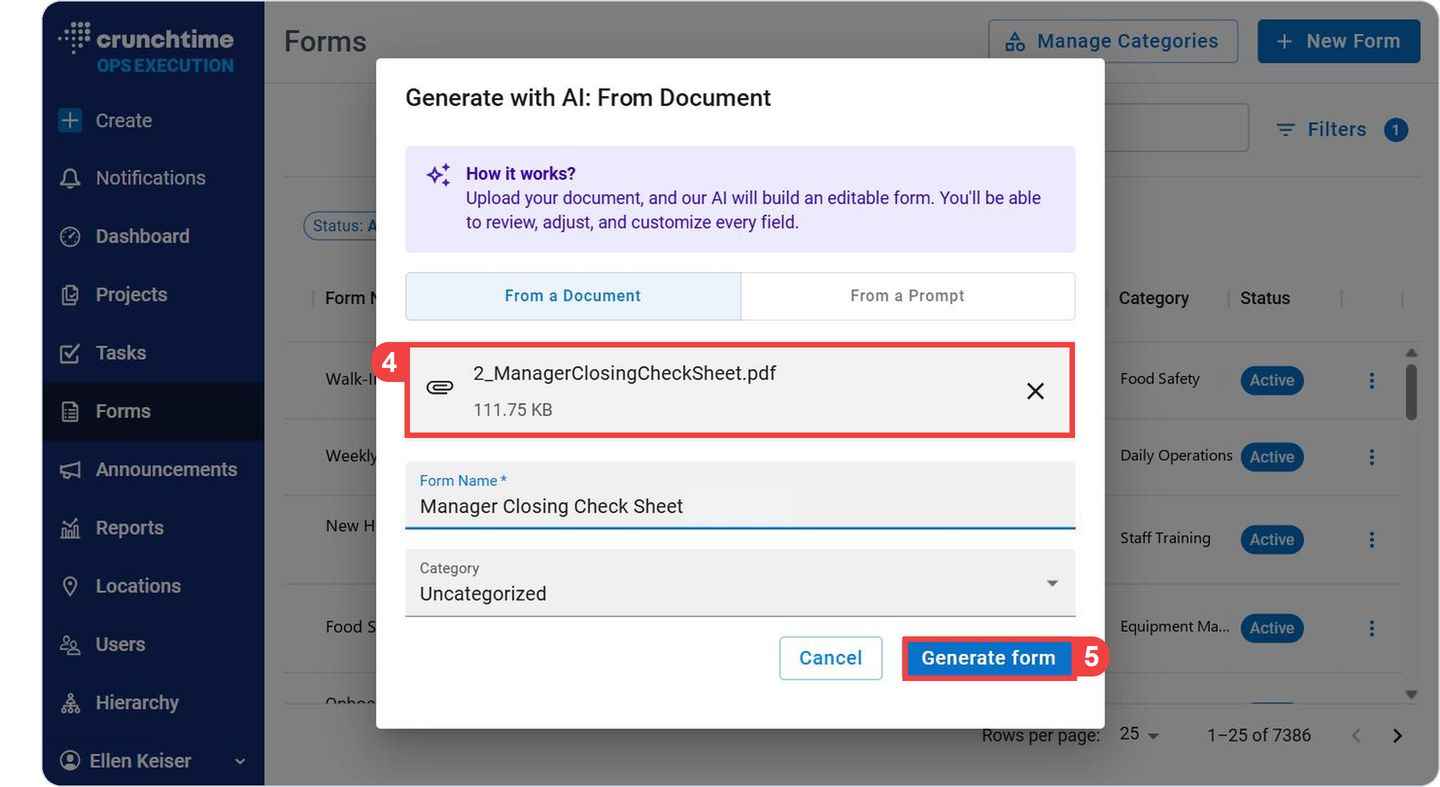
Check that the file name shows in the upload area and that Generate form is now active.
Select Generate form.
The AI builds your form after you select Generate form. A spinner and a message show while it works.
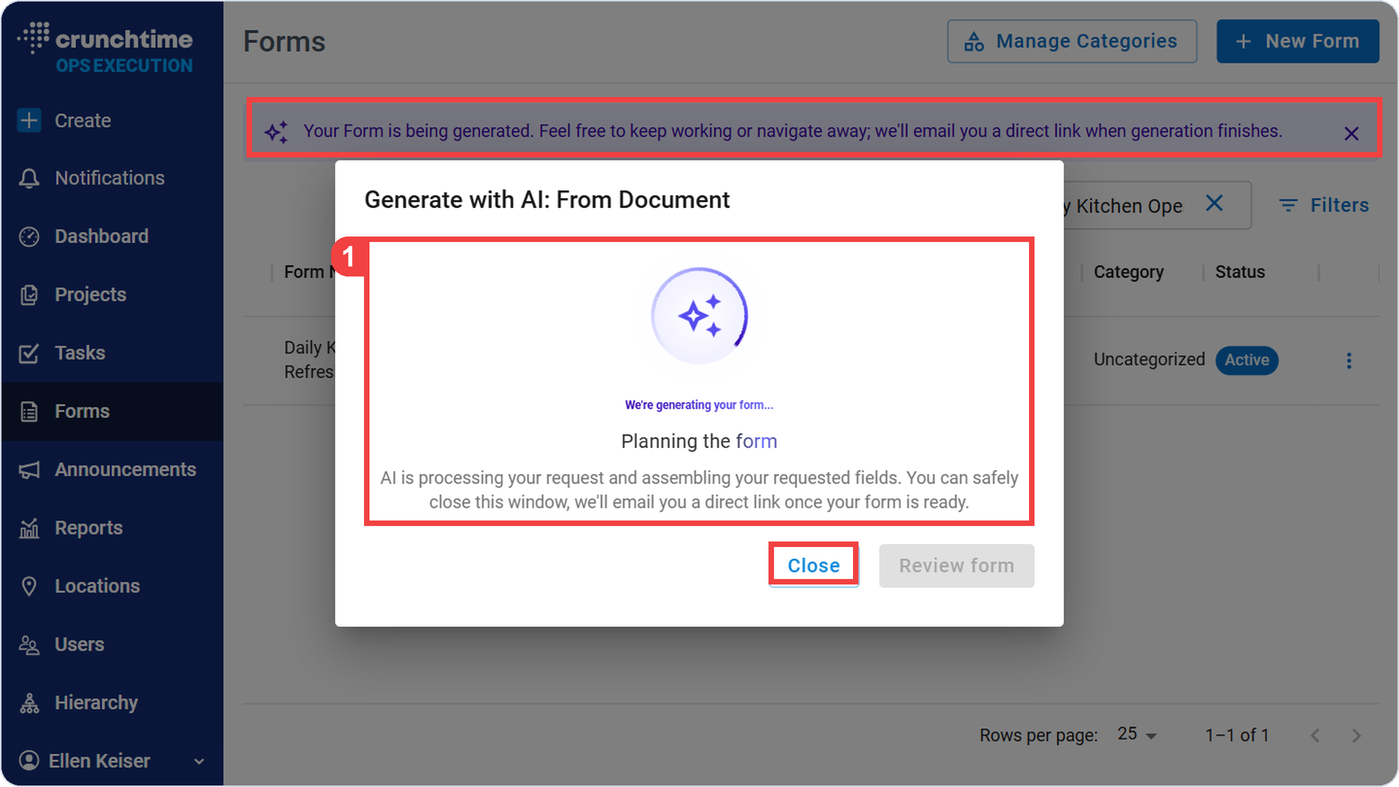
You can wait while the spinner and message show or while AI is processing your request, you can safely close this window while the form generations continues in the background.
• The message updates with which section the AI is building, for example “Building section Financials and Computer (2/3).”
• The window has a Close button if you want to close it while you wait; a banner at the top of the page confirms you can keep working or navigate away. A direct link will be emailed to you once your form is ready or you can wait for the Review Form button to activate once the form generation has finished.
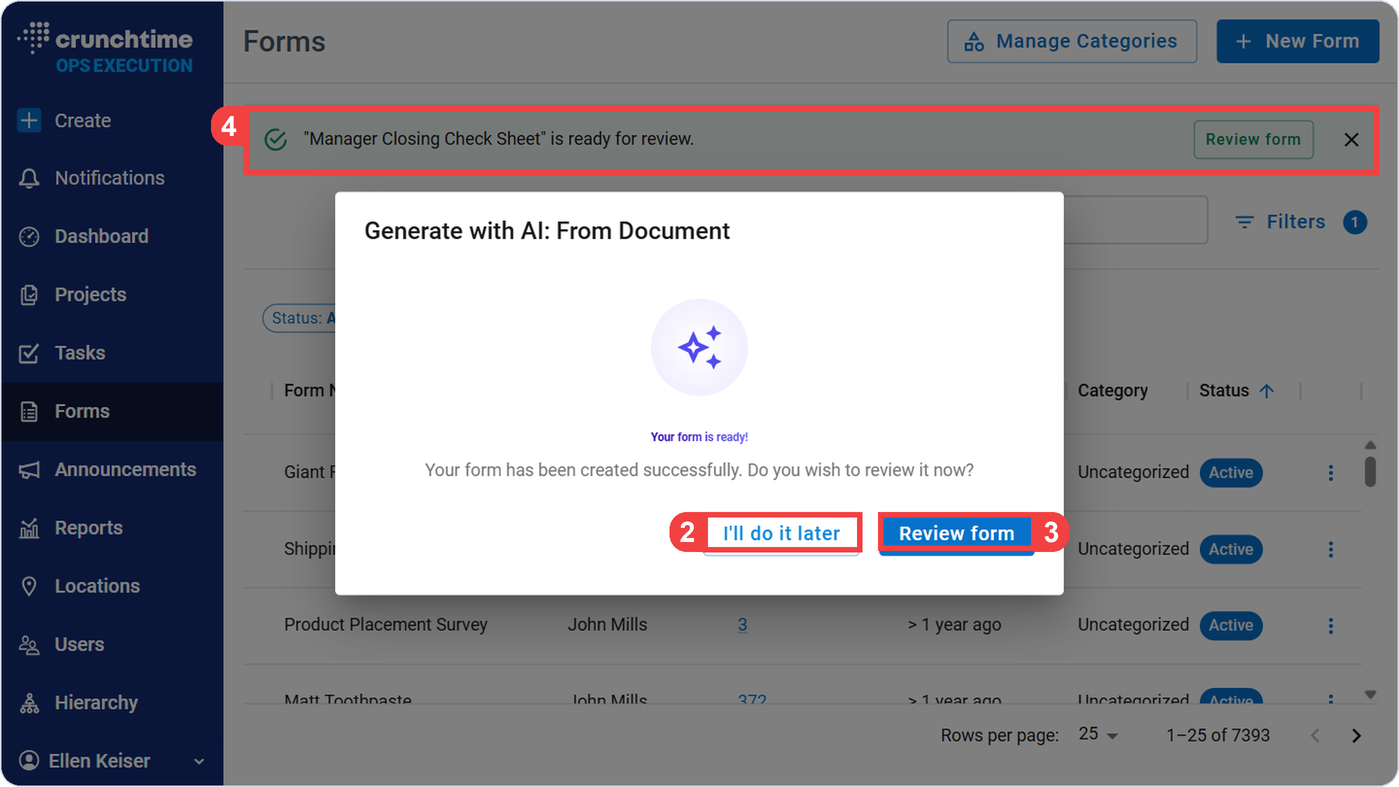
I’ll do it later closes the window on the Forms page.
Select Review form to open your form in the form builder
A banner at the top also has a Review form button and will remain on the Forms page until you close it or for 30 minutes after it appears.
Anytime you create an AI-generated form, you will receive an email with a direct link to the form in Ops Execution.
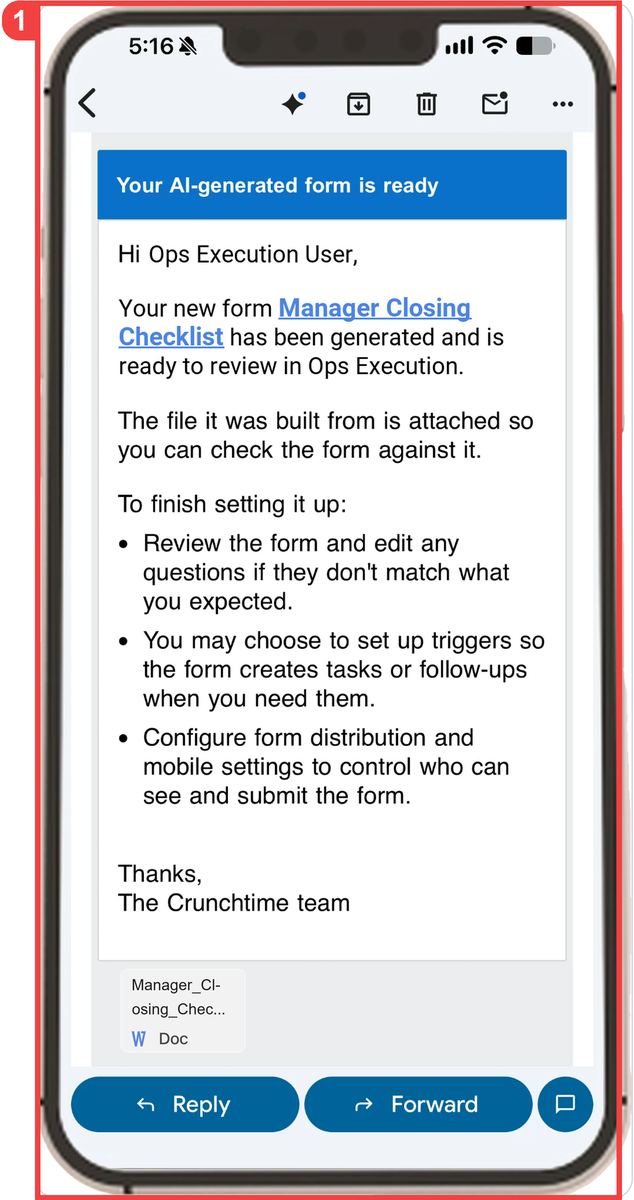
In addition to a direct link to the form in Ops Execution, the email will also include the file it was built from as an attachment so you can check the form against it, as well as these helpful tips to finish setting up your form:
• Review the form and edit it in the form builder to ensure your questions match what you expected.
• Set up triggers so the form creates task or follow-ups when you need them.
• Configure form distribution and mobile settings to control who can see and submit the form.
The AI needs a short description of the form you want and a name for the new form. The Generate form button stays grey until you finish these. Category is always optional and will default to Uncategorized.
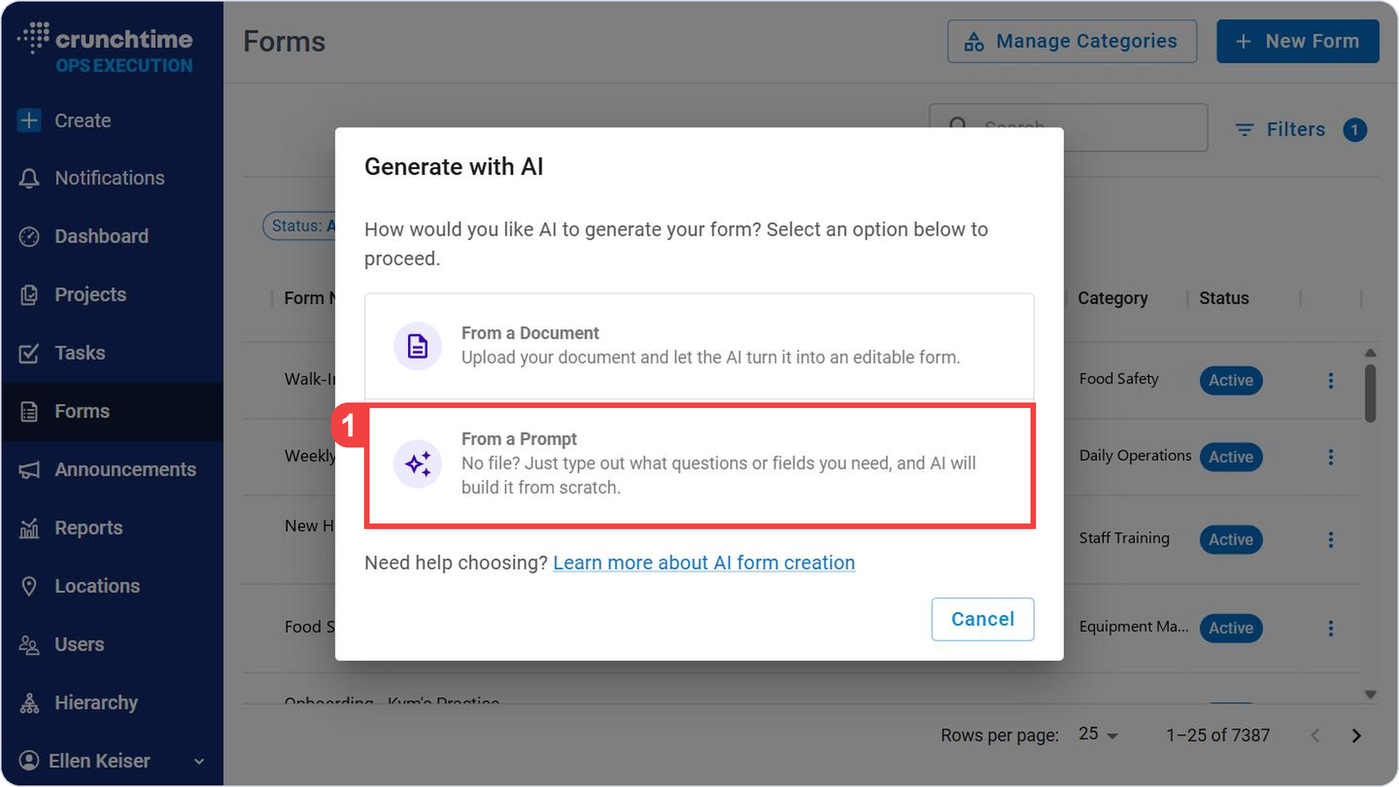
From the Generate with AI screen, select From a Prompt.
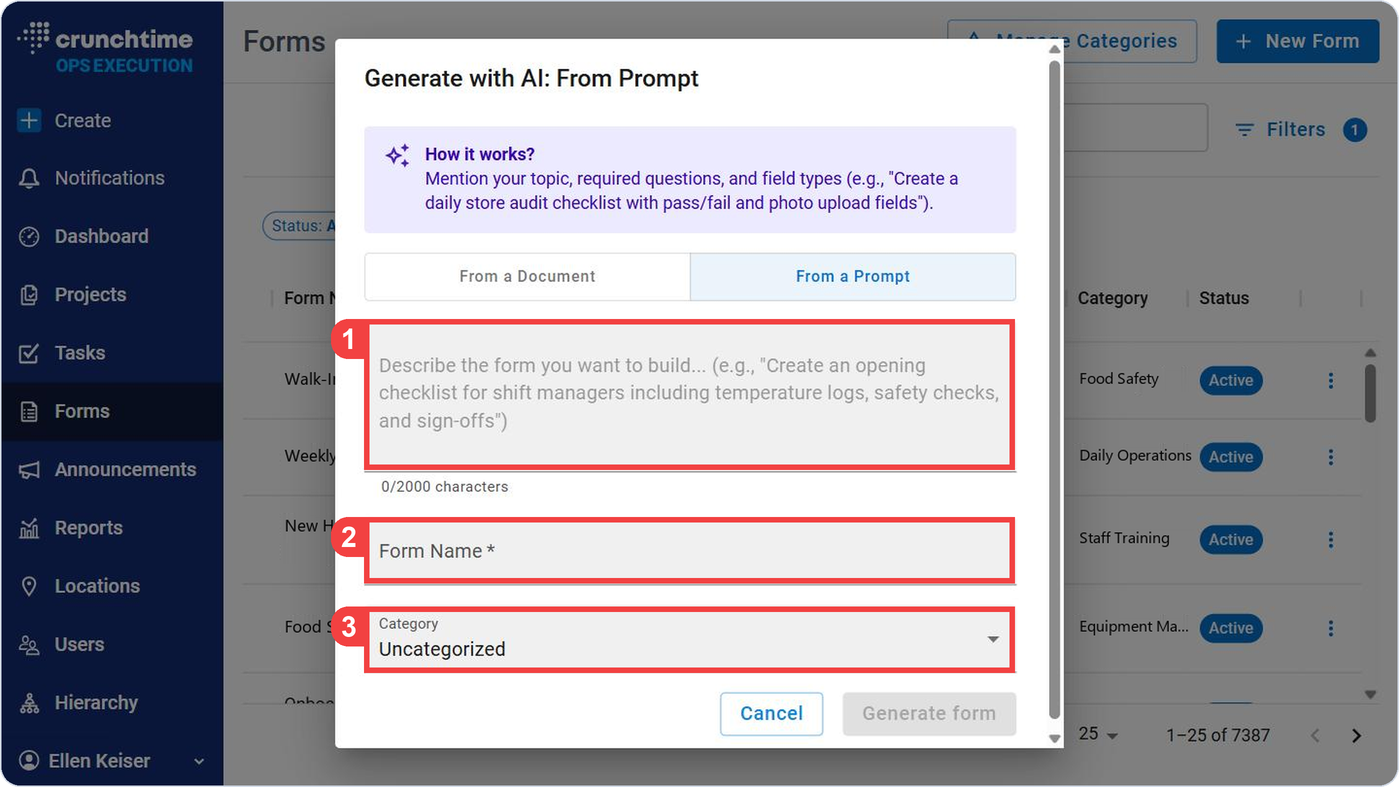
Describe the form you want to build in the text box, including your topic, the questions you need and the field types. • The box accepts up to 2,000 characters and shows a running character count.
Enter a name for your form in Form Name.
Form Category is optional. Choose a category from the Category list, or leave it at the default Uncategorized. You can edit, create or delete form categories by selecting Manage Categories from the Forms page
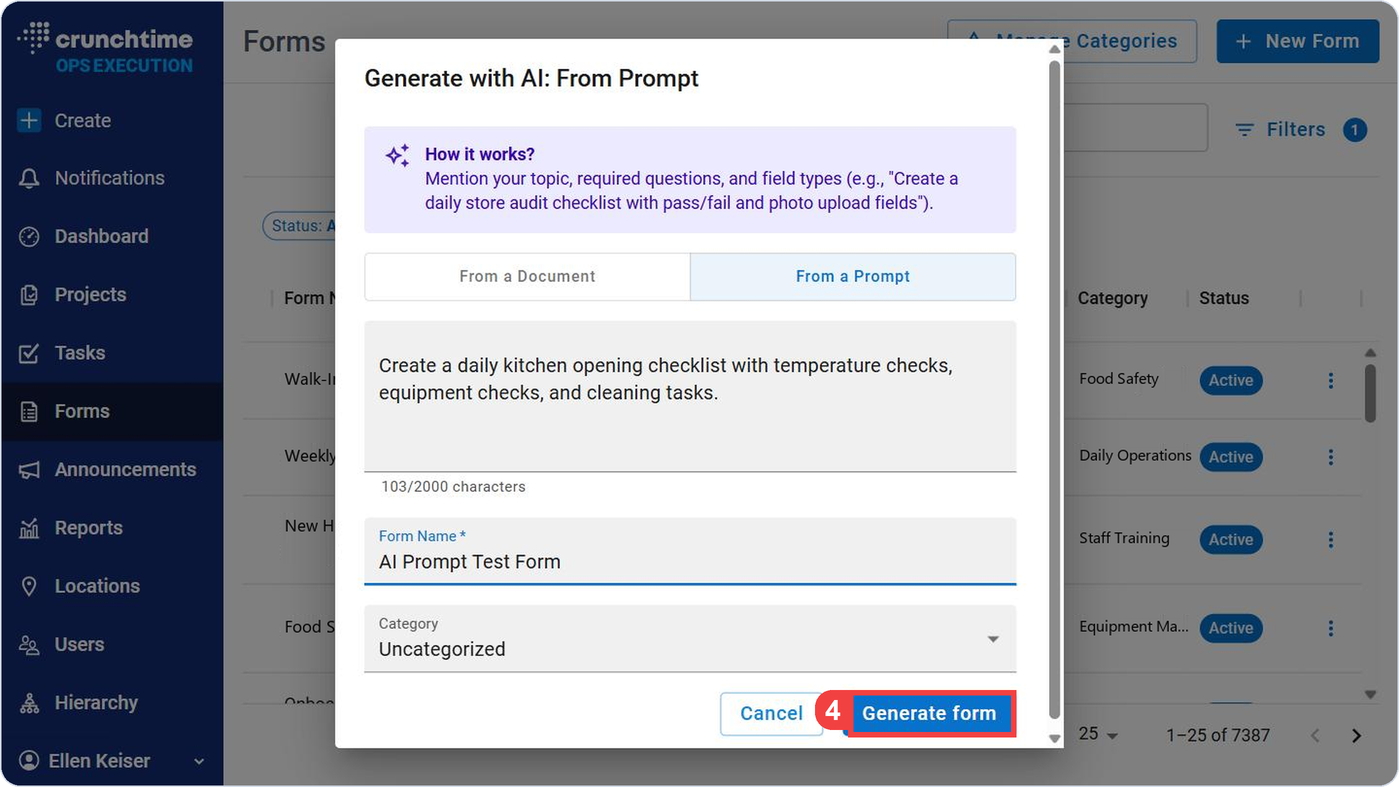
Select Generate form.
Check that Generate form is now active.
The AI builds your form after you select Generate form. A spinner, a progress message and a banner show while it works.
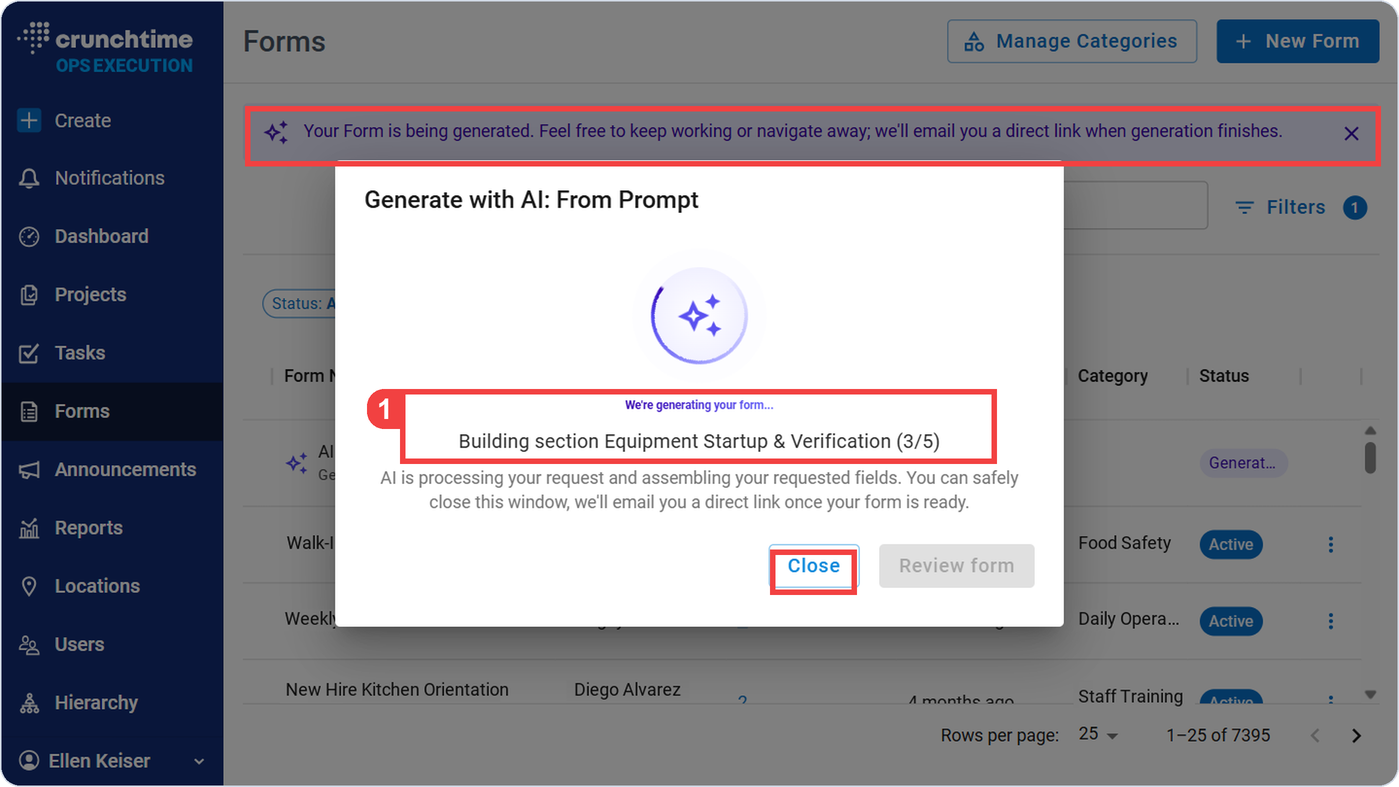
Wait while the progress spinner and message show.
• The message updates with which section the AI is building, for example “Building section Cooking & Hot Holding Equipment Startup (3/7).”
• The window has a Close button if you want to close it while you wait; a banner at the top of the page confirms you can keep working or navigate away. A direct link will be emailed to you once your form is ready or you can wait for the Review Form button to activate once the form generation has finished.
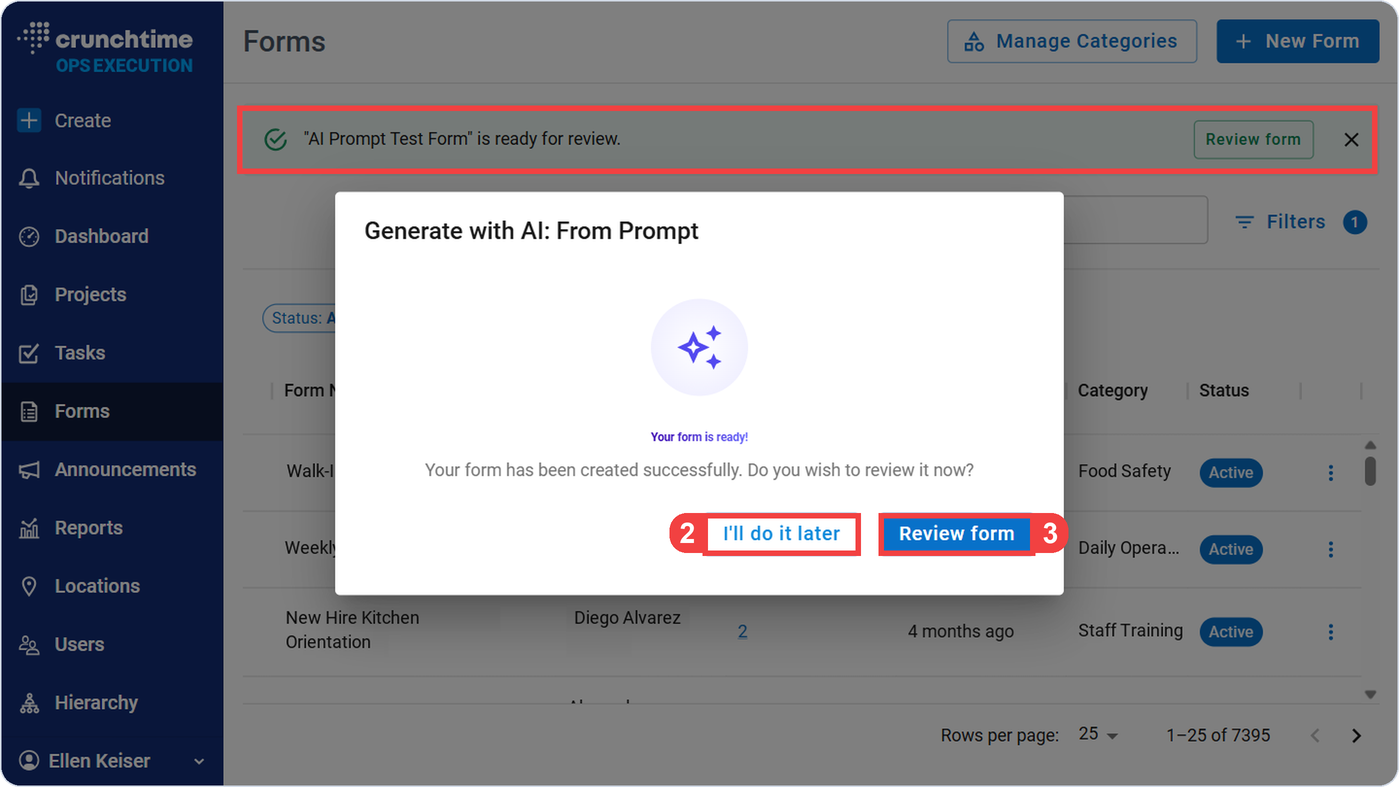
Select I’ll do it later to close the window on the Forms page.
Select Review form to open your form. • A banner also confirms the form is ready, with its own Review form link. This banner will remain on screen until it’s closed or for 30 minutes after it appears.
The published form opens in the form builder, the screen where you build and change forms. It works like any form you build yourself, so you can edit, move or delete any question. This applies whether your form came from a document or from a prompt.
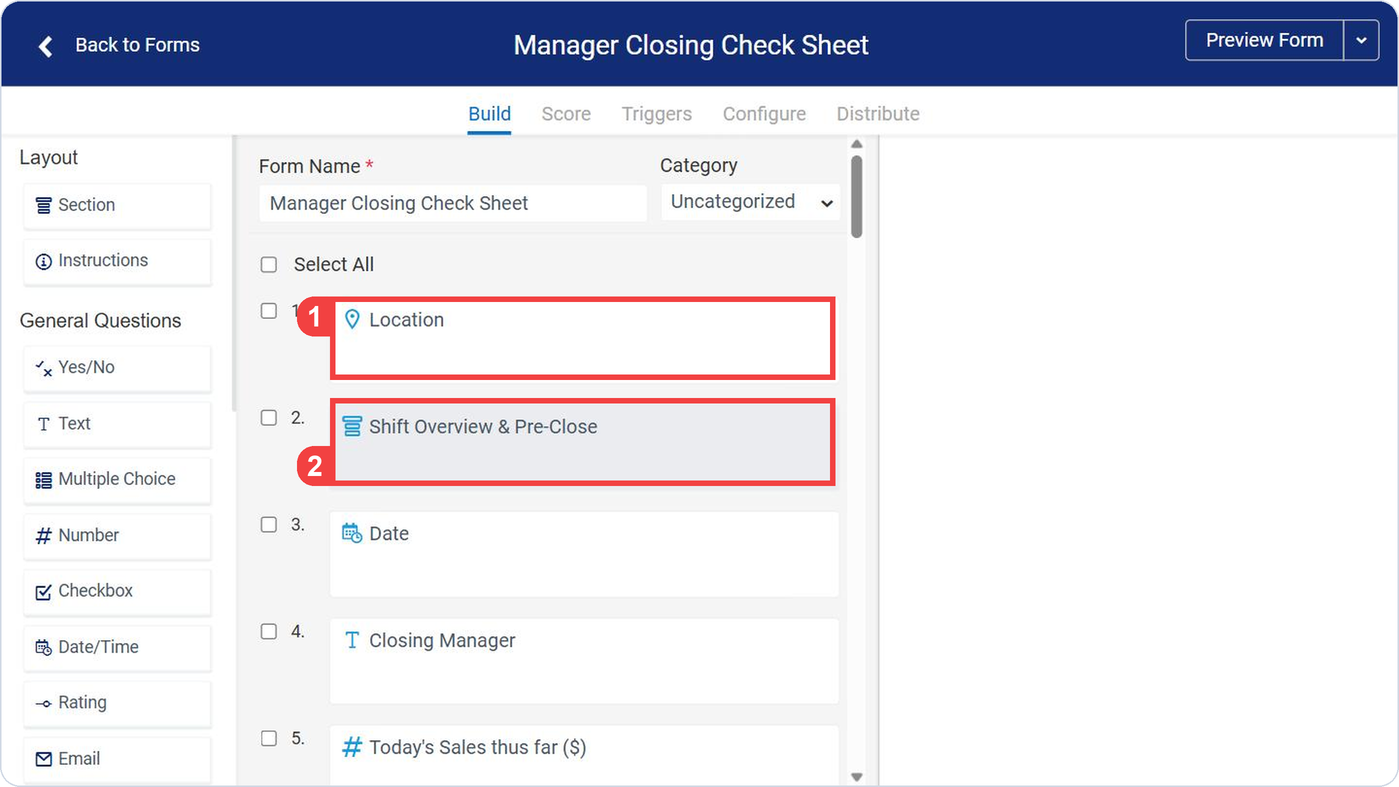
It is possible that your original PDF form did not have sections or field types, but we add them for clarity. You should check that your form is correct and all questions are there, but it might not be a perfect 1x1 mapping. The form builder built the form to fulfill the user's intent while also ensuring it will work well within Ops execution.
Read the instructions on each question, so your team gets the same guidance as before.
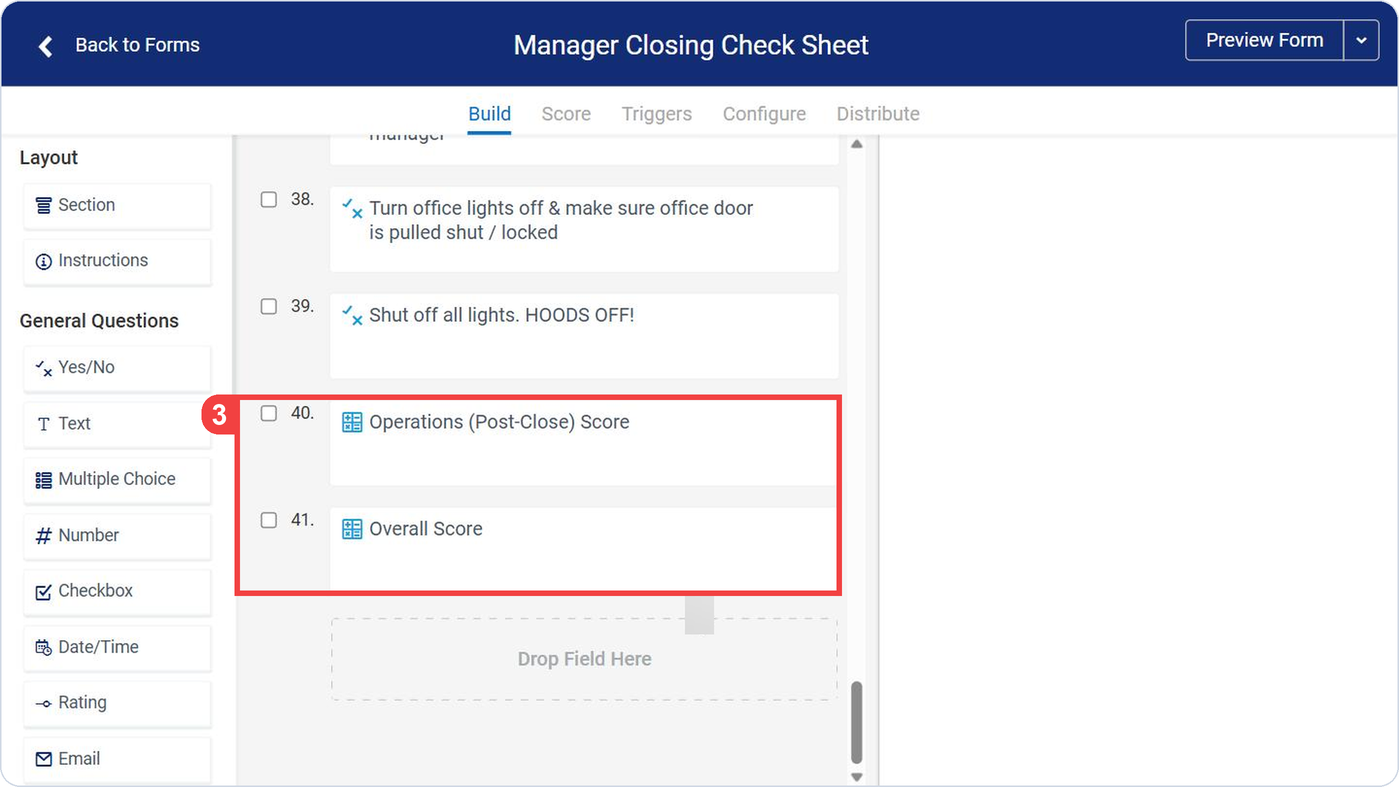
Scroll to the end and check that any score items match your original uploaded form document. If you did not have score items in your original form, the form builder might have created them to help you use the platform better.
| What to check | What to look for | Where in the form |
|---|---|---|
| Field types | Each question is the type it was on your original (if it had a type on your original form). | Question list |
| Section names | Questions sit under the right headings | Section items |
| Instructions | The guidance matches your original | Question details |
| Score items | Scores match your original form | End of the list |